There is a special kind of satisfaction that comes from walking into a room and knowing that the striking wall treatment before you was conceived in your imagination and brought to life with your own hands. DIY decorative panels have emerged as the perfect medium for this creative expression, offering a blank canvas that can become virtually anything you envision. Unlike traditional wall treatments that limit you to predetermined patterns and profiles, decorative panels invite experimentation with shape, color, texture, and arrangement. They allow you to think beyond the rectangle, to consider how geometric forms can interact, how depth can create shadow play, and how repetition can establish rhythm. This creative freedom explains why decorative panels have captured the imagination of DIY enthusiasts who want their homes to reflect personal style rather than catalog conformity. Whether you lean toward the clean lines of modernism, the organic forms of biophilic design, or the bold statements of maximalism, decorative panels provide the medium for translating your aesthetic vision into three-dimensional reality. The best part is that you don't need to be a master craftsman to achieve stunning results, just willingness to experiment and the right guidance to bring your ideas to life.
The Creative Possibilities Beyond Traditional Molding
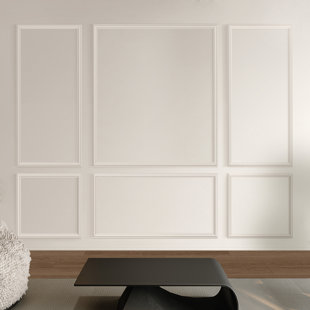
While traditional wall molding follows established conventions with predictable patterns and profiles, decorative panels open up a universe of creative possibilities limited only by your imagination. You might design a wall of interlocking hexagons that creates honeycomb texture, or overlapping circles that suggest bubbles floating across the surface. Asymmetrical arrangements can bring dynamic energy to quiet spaces, while symmetrical compositions establish calm order. The panels themselves can feature carved details, layered depths, or smooth surfaces that let color do the talking. Some designers create panel systems that incorporate lighting, with LED strips tucked behind floating panels to create ethereal glow effects. Others use panels to frame and highlight existing architectural features, drawing attention to windows, fireplaces, or alcoves. The scale of your design can vary from intimate groupings that accent small spaces to full-wall installations that transform entire rooms. This creative flexibility means your decorative panel project can be as subtle or as dramatic as you desire, expressing your personality while enhancing your home's architectural character.
 ## Material Choices That Shape Your Design
The material you choose for your diy decorative panels ↗ fundamentally influences both the installation process and the final appearance, making this decision central to your project's success. Medium-density fiberboard stands as the most popular choice for good reason, offering smooth surfaces that paint beautifully, dimensional stability that maintains crisp edges, and workability that responds well to cutting and shaping. Plywood provides strength for larger panels and offers natural grain patterns that can become features when stained rather than painted. For lightweight applications, foam-core materials make installation effortless while providing enough rigidity for most designs, though they require careful handling during cutting. Reclaimed wood brings sustainable character and unique patina that manufactured materials cannot replicate, though it demands more preparation and selection work. Acrylic and polycarbonate panels introduce translucency and the possibility of backlighting, creating ethereal effects that change throughout the day. Even unexpected materials like cork, leather, or fabric-wrapped boards can become decorative panels when thoughtfully incorporated. Each material brings different characteristics to your project, and understanding these helps you select the option that will best realize your creative vision while matching your skill level and tool availability.
Design Principles for Visually Successful Panels
Creating decorative panels that satisfy the eye involves more than just arranging shapes on a wall, it requires understanding basic design principles that govern how humans perceive visual composition. Balance matters enormously, with symmetrical arrangements providing calm stability and asymmetrical compositions offering dynamic tension. Scale determines whether your panels relate appropriately to your room, with larger patterns suiting spacious walls and smaller-scale designs fitting intimate spaces. Rhythm creates visual flow through repetition of shapes or spacing, guiding the eye across your composition in pleasing ways. Contrast between positive and negative space, between raised panels and the wall behind, creates the depth that makes decorative treatments interesting. Color choices can either unify your design through harmonious palettes or energize it through strategic contrast. Proportion governs the relationships between panel sizes and the wall as a whole, with classical ratios like the golden section providing time-tested guidance. You don't need to be a trained designer to apply these principles, simply being aware of them as you plan helps you make intuitive decisions that lead to visually successful results. Taking time to sketch options and test arrangements before committing pays enormous dividends in final satisfaction.
Tool Considerations for Different Skill Levels
The tools required for your decorative panel project depend largely on the materials you choose and the complexity of your design, allowing you to match your investment to your comfort level. For simple designs using pre-primed panels, basic measuring tools, a quality straightedge, and a sharp utility knife might suffice for cutting softer materials. As designs become more complex, a jigsaw enables curved cuts that open up organic possibilities. A circular saw with a guide ensures straight, clean cuts on larger panels, while a miter saw provides precision for angled pieces. For those ready to invest in their DIY capabilities, a track saw offers the ultimate in straight-cutting precision without the need for elaborate setup. Sanding tools, from simple sanding blocks to random orbital sanders, prepare edges and surfaces for finishing. Drills and drivers handle any mechanical fastening your installation requires. The beauty of DIY decorative panels lies in scalability, you can start with simple designs using basic tools and gradually expand your capabilities as your confidence grows. Many successful panel projects require no more than a handful of tools you may already own, making this an accessible entry point into creative wall design.
Installation Methods for Secure Results
Getting your decorative panels securely attached to walls involves choosing the right method for your panel weight, wall type, and long-term plans. For lightweight panels in low-traffic areas, quality construction adhesive alone often provides sufficient holding power when applied according to manufacturer instructions and given proper curing time. Heavier panels benefit from mechanical fasteners, either finishing nails that can be set and filled for invisible results, or clear panel connectors that become part of the design aesthetic. For renters or those who anticipate future changes, removable mounting systems offer security without permanence, using specialized hardware that distributes weight while allowing clean removal. Panels installed over large areas should account for the slight expansion and contraction that even stable materials experience, with small gaps at edges that get covered by trim or filled with flexible caulk. The condition of your underlying wall matters tremendously, with loose plaster or damaged drywall requiring repair before installation can proceed securely. Taking time to locate studs for heavier installations provides additional security, though modern adhesives and appropriate fasteners can support surprising weight in drywall alone when properly applied.
 ## Color and Finish Strategies That Transform
The colors and finishes you apply to your decorative panels represent the final transformation, turning assembled pieces into integrated design features that either blend with or boldly contrast against your walls. Painting panels the exact same color as the surrounding wall creates subtle texture that reveals itself through shadow and light rather than color contrast, an approach that feels sophisticated and understated. For more drama, contrasting colors make your panel design pop, with dark panels against light walls or vice versa creating striking graphic impact. Two-tone approaches, where panel faces differ from panel edges, add dimensional complexity that changes with viewing angle. Glazing techniques can add depth and aged character to painted panels, while metallic finishes introduce reflective interest that catches light dramatically. For wood panels, stains and clear finishes reveal natural grain while providing protection and sheen options from matte to high-gloss. Some designers incorporate wallpaper or fabric within panel sections, creating mixed-media effects that add texture and pattern. The finish strategy you choose should consider how the panels will interact with room lighting throughout the day, as colors appear differently in morning, afternoon, and evening illumination.
Incorporating Panels Into Overall Room Design
The most successful decorative panel installations feel like integral parts of their rooms rather than isolated additions, relating thoughtfully to furniture, architecture, and function. Consider how your panels interact with seating areas, perhaps extending behind sofas to create cozy alcoves or defining dining zones within open floor plans. Lighting deserves particular attention, with picture lights, sconces, or track lighting positioned to highlight panel textures and create dramatic shadows. Artwork hung against paneled walls should relate to the panel pattern, either fitting within sections or deliberately spanning them for intentional contrast. Furniture placement can echo panel rhythms, with sofas and tables aligning with vertical divisions for cohesive composition. In rooms with architectural challenges like radiators or ductwork, panels can incorporate these elements rather than fighting them, creating unified designs that acknowledge rather than hide existing features. Even functional considerations like outlet placement can become opportunities, with panels cut to accommodate switches and receptacles in ways that maintain pattern integrity. This holistic thinking transforms decorative panels from wall treatments into fundamental design elements that shape how entire rooms look, feel, and function.